Nestled amidst the colourful surroundings, I often find inspiration in the ways everyday materials can be transformed. At Elzinga Art, the principle that creativity exists in every scrap has guided many of my projects since 2012.
One of my favourite ways to give old materials new purpose is by crafting fabric collage.
Unlike patchwork quilting, this technique allows for total freedom – mixing patterns, textures, and even unconventional fabric finds.
Using fabric collage, I can turn items like worn T-shirts, vintage linens, or off-cut fabrics into striking new cloth, sparking stories through patterns and colour.
This approach not only celebrates sustainability but also invites artists and beginners alike to experiment with textile art in an engaging, approachable way.
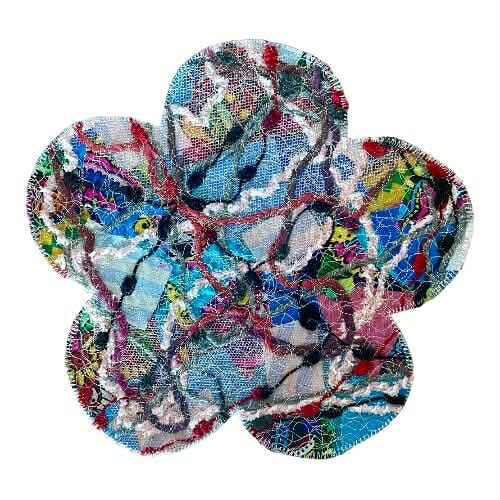
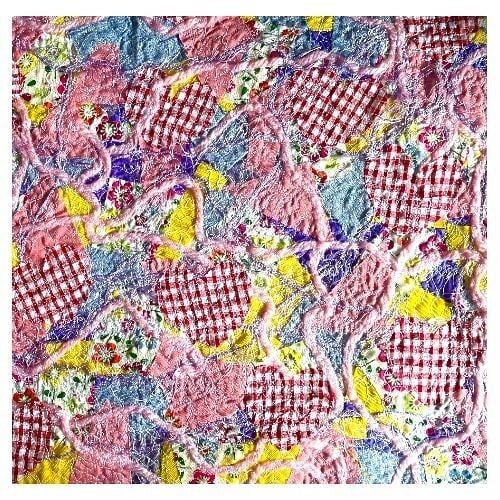
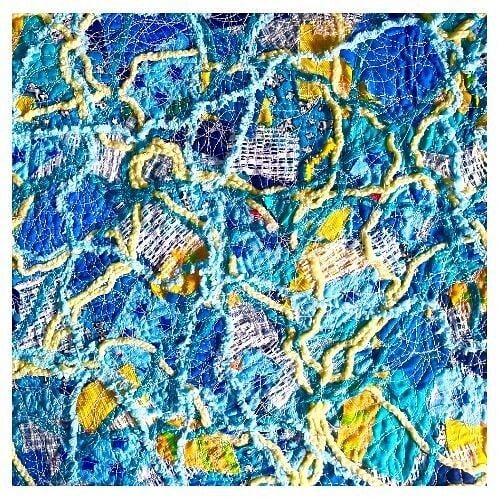
Let me show you how to transform those well-loved, once-forgotten fabrics into vibrant new creations that tell their own colourful stories such as these floral mats below.


Gathering Fabrics And Tools For Creative Collage
Starting a fabric collage begins with collecting fabrics that speak to your imagination. I often look around the home for:
Old shirts or dresses with appealing textures
Outgrown children’s clothing
Vintage tablecloths, napkins or doilies
Fabric off-cuts from previous crafts
Op shops or tip shops often have old fabric off cuts
Mixing contrasting materials, such as denim, cotton, silk, and lace can create depth and visual interest. Next, I gather simple tools:
Sharp scissors for neat cutting
Fabric glue or fusible web for quick bonding
A basic iron for setting adhesive
Cotton or linen base cloth (l use callico which can be bought in a roll)
textured wools or lace for decorating once the fabric is all placed
Needles and matching or contrasting thread, if hand-stitching details
Preparing each element is easy: wash and iron fabrics (if you wish, l generally don't) to remove creases and flatten them for cutting. You can sketch basic shapes or patterns on paper beforehand, making it easy to arrange pieces without a plan feeling too rigid, but it depends whether your making a picture or creating fabric. After all, the joy of collage is in the freedom to layer, move, and swap until something magical takes shape.
This gathering stage always sparks ideas, helping me see the possibility in even the most humble fabric scrap.
Bringing Your Fabric Collage Vision To Life
Once everything is ready, the fun really begins. I usually lay out the base cloth (Calico fabric) and generally no bigger than 60cm x 40cm, anything bigger than that l find a bit difficult to sew, and start arranging fabric pieces into a rough design. Whether I'm inspired by a garden in bloom, abstract shapes, or simply playful colour blocking, there’s no strict rule—let creativity guide you.
Here are my steps:
Begin with larger background shapes, anchoring the composition.
Layer smaller pieces over the top for interest and contrast.
You can use fabric glue or fusible webbing to temporarily holds the fabric in place whilst you sew, however l prefer to use dissolvable fabric (fabric shops) and lay the sheet across the finished work and pin it, this holds things in place whilst you're sewing, then simply run it under water and it will disolve away.
Depending on how piable you wish the fabric to be, washing very little of the dissolvable fabric will make it feel more rigid, rinsing well will make it softer and more piable. Running under water gently wash your hand over the sewn item back and forth, you will feel a slimmy texture, the more you wash the slimmy feel away the more flexible and softer the fabric will become.
So, it depends what you plan to do with your fabric as to how much you hand wash it, don't place in the washing machine.
Be sure to roll your fabric up and gently squeeze, don't twist to take added water away after washing and lay your fabric flat on a table to dry naturally, it will take a little while becuase it will have added water retention, so be patient.
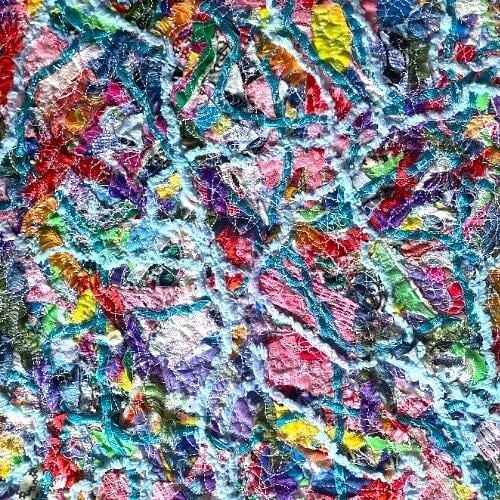
Add stitched details – secure edges or create highlights with running stitch, whipstitch, or even decorative embroidery if desired. I usually work with a wavey stitch on a bigger setting size (its quicker) then sew in any direction, over lapping as l go, right to left, left to right. There is no way thats better, just head for a gap, is my general thinking. You need to do this quite intensely leaving no more than about 1cm-1.5cm gaps between a line. The reason for this is, big gaps mean fabric isn't sewn down and it will lift and look messy and unfinished. It will generally take around 3-4hrs hours at minimum to do a 60x40cm sheet.
Mistakes are part of the process and often lead to exciting results. If I’m unsure how a piece fits, I leave it loose so I can change it later. Once complete, I check for loose edges and reinforce with extra stitches where needed.
The finished panel can find new life as a cushion cover, wall art, tote bag, or even wearable art. It’s rewarding to watch old fabrics become something both useful and artistic, full of memories and new character. Below are cushion covers l made.
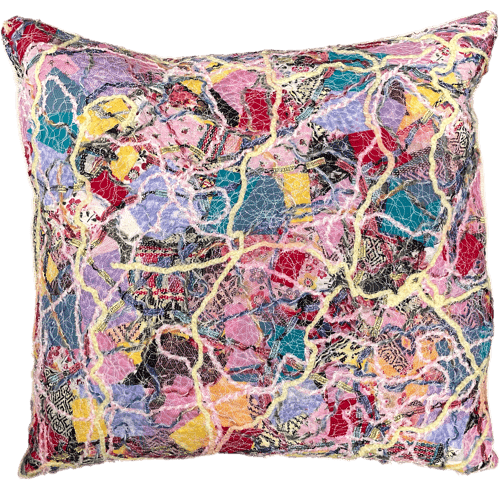
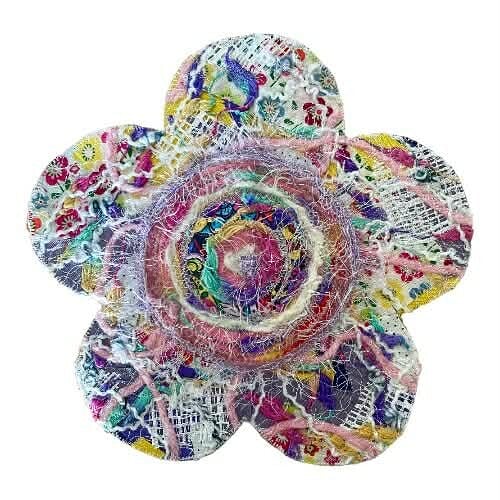
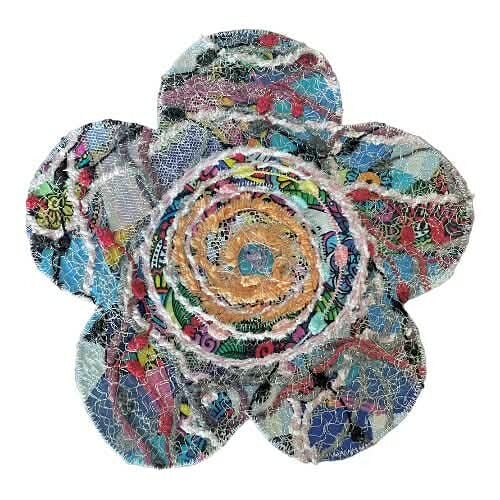
I always add textured wools to my fabrics, l love the textures it brings, l add them on top of my finished fabric work before l add the dissolvable fabric and sew.
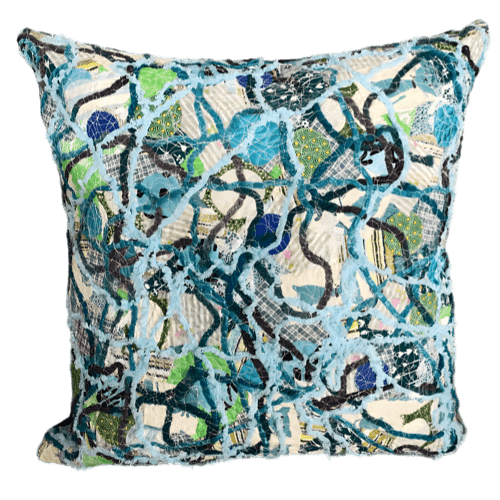

Sometimes l enjoy adding lace and wool as my topping, it brings a unique finish
Celebrating The Colourful Journey Of Reimagined Textiles
Turning worn and forgotten fabrics into a fresh, unified piece reflects the creative spirit and brings such joy when you see your designed dried after rinsing off the dissolvable fabric and laying it nicely flat on a bench to dry, and then seeing it in its awesomeness.
Each collage is unique—layering stories and textures that might otherwise have been discarded.
It’s a method rooted in sustainability, with an open invitation for innovation.
By embracing every stage, from gathering materials to thoughtfully layering and finishing, anyone can create textile art that feels both environmentally thoughtful and artistically rewarding.
This approach speaks to the core of living a life in colour—full of possibility, vibrancy, and ongoing story. There’s nothing quite like seeing familiar old cloth renewed for a new purpose, and with each project, I find joy in sharing both technique and inspiration with fellow creators.
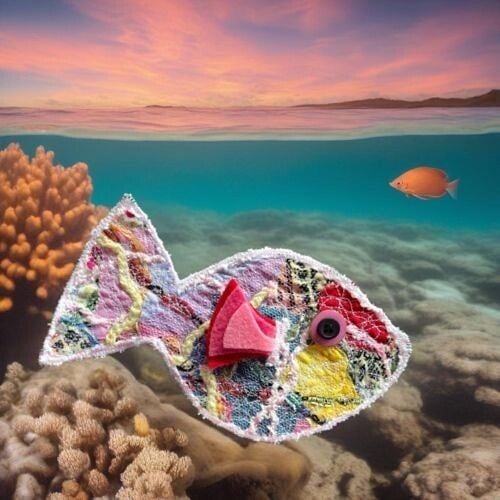
I use this process to create patches, they can be cut to any shape, a sticky back ironed to them and them they become ironable patches, ready for application to clothing, furniture or framing.
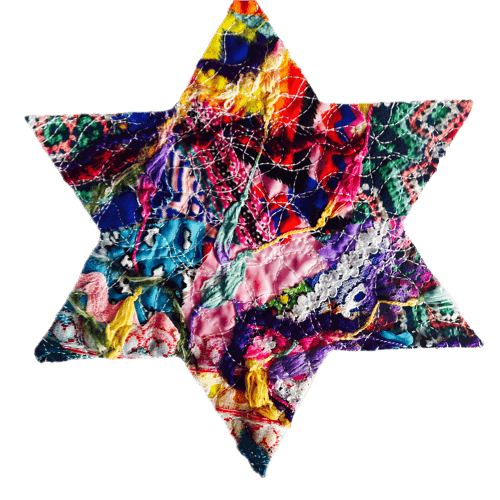
Shapes can be endless, uses can be endless, you can make bags, mats, pillows, book covers from fabrics, or use patches and add to something to make it truely unique, a denim jacket, jeans or a jumpsuit.
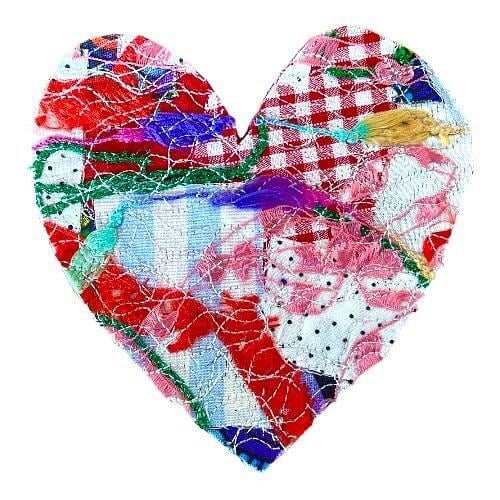
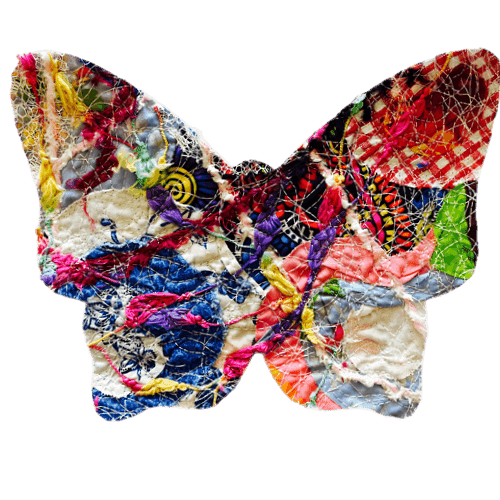
Any shapes can be free draw to a piece of cardboard, l tend to trace around onto the back on my fabric then cut out that way.
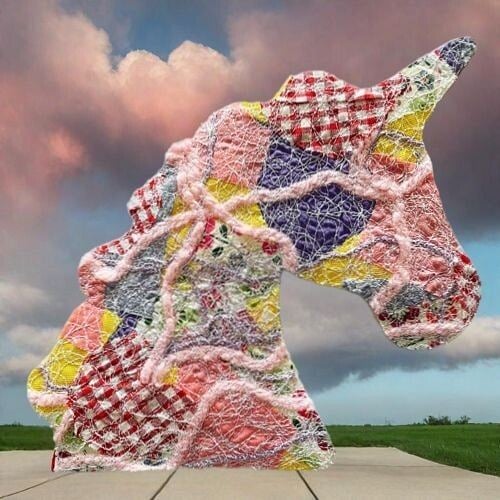
Leave a patch plain as above or add additions such as eyes, finns, nose, etc like below.
Elzinga Art hopes you have enjoyed this lesson and would love to see your creations so please send me in some pictures. elzinga@live.com.au