From the gentle sway of eucalypt trees to the vibrant sunlight reflecting across rooftops, there’s no end to the sources of creativity in the world.
Living here brings a sense of adventure to every artistic project. Since the beginning of Elzinga Art, I have seen how the right tools and a bit of know-how can spark even the simplest ideas into wonderful creations.
Making a wire armature for a sculpture is one such technique—perfect for both beginners and those looking to add structure to their developing artworks.
Today, I want to share a lesson that breaks down this essential method, lengths of wire and foil into the first steps of something special. Whether someone aims to craft a lively animal, a quirky character, or an abstract form, creating a strong armature is the foundation that helps sculpture stand tall and express imagination.
Gathering Materials And Choosing The Best Wire For Sculptures
Before getting hands messy with clay or plaster, the first task is assembling the right materials. The right tools not only make the process smoother but also ensure the sculpture’s structure lasts. For wire armatures, I suggest these essentials:
- Aluminium wire: Lightweight, flexible, and rust-resistant, this wire is perfect for most projects and available in various gauges.
- Pliers: Essential for bending and cutting the wire. Needle-nose pliers help manipulate the finer details.
- Wire cutters: For clean cuts, wire cutters are a must.
- Masking tape or florist tape: To bind wires at joints and add grip for sculpting materials.
- Reference images or sketches: These help keep the proportions correct and the creative vision clear.
Choosing the gauge (thickness) of wire depends on the sculpture’s size and detail. For small figures (under 20cm tall), a thinner wire (around 1–2mm) is enough. Larger works need thicker wire or double-up for extra strength. Remember, the armature forms the skeleton—so it must match the intended pose and size. With all supplies in place, the creative process truly begins.
Shaping The Armature Step By Step For Lasting Results
Creating a wire armature is all about building a strong base for the sculpture.
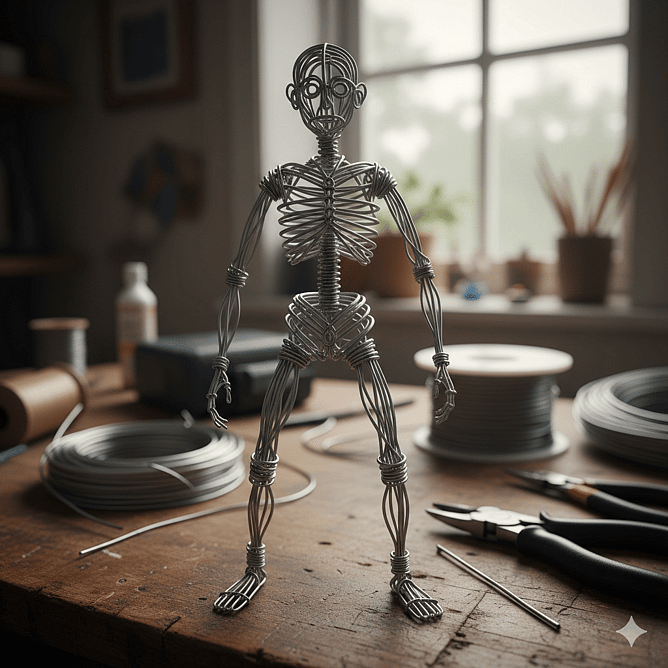
First, I measure and cut the main wire to match the height of my intended figure, leaving a bit extra at each end. This forms the backbone.
Next, I bend another length to create the arms or limbs, twisting it firmly around the central wire to anchor—think of this step as building a stick figure. It helps to visualise the pose so that the sculpture has a natural flow.
Once the main form is there, I add cross-bracing with smaller pieces for support, especially in areas that will hold extra weight like legs or neck.
Masking tape comes in handy now—wrapping the joints creates grip and keeps everything steady. For more flexible sculptures or animals with tails, extra wire can be woven in and curled naturally. Adjusting proportions early, before adding any clay, foil or filling, is important. I regularly check using sketches or by comparing with the reference image to refine arm and leg lengths.
After all connections feel sturdy, I shape the body contours slightly with gentle bends, so the structure echoes the energy of my intended subject. At this point, the armature is ready for layering on materials—whether it’s clay, paper mache, or fabric—without risk of collapse.
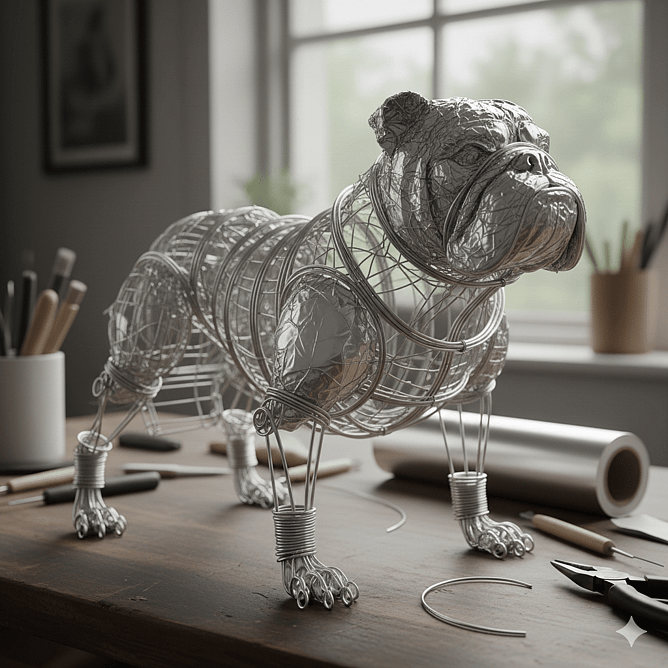
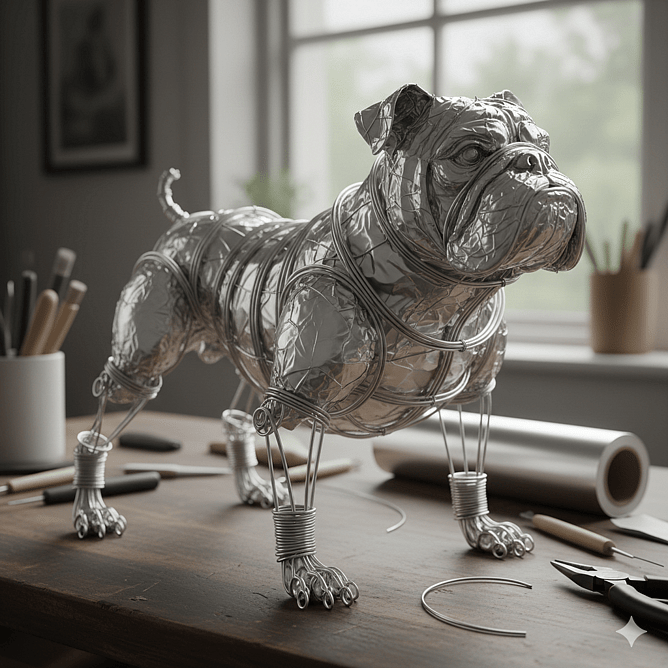
The armature is made first then to provide strength l often pack it with foil inside and around the outside, whilst completing the outside you are looking to add weight to the shape of your object. When complete, l use masking tape and cover every inch of the foil. The reason you cover it all is because foil rusts, and your sculpture may rot from the inside out if moisture gets in, the tape blocks the moistuure out.
Bringing Creativity To Life With A Solid Foundation
A wire armature is much more than a hidden skeleton—it’s the magic beneath the surface, holding up every artistic idea.
With some basic materials and a little patient twisting, anyone can build an armature that invites inspiration and supports creative experiments.
This simple method makes sculpting less daunting, turning imagination into something that lasts.
Each finished piece has its own presence, thanks to the framework hidden beneath. Exploring sculpture in this way is truly about living life in full colour, confidently trying new things, and turning dreams into shapes that can be held and admired.
Base plates
For ease of operation consider adding a base plate, this can be made from timber or poured from plaster of paris or concrete. You just need to ensure the base used and its size is going to be able to support the weight of your intended sculpture to avoid it falling over when finished.
Concrete or plaster are good ideas as these can be poured into any plastic constructed container and easily removed by cutting it away, think icecream containers, large milk containers, just cut them down to size.
Adding your base wire into these bases when poured means you'll have a nice fixed point to start your armature. Tape 2 pieces of wire from one side to the other of the container and then the reverse direction with another 2 so you have a cross shape to hold the wire in place whilst the mixture is drying.
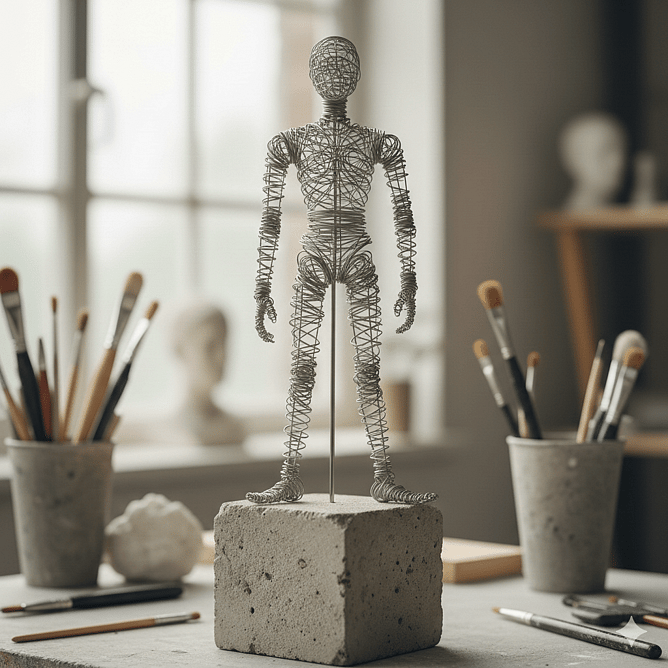
If you don't want to see your support wire, add it to be inside a leg, that ways its hidden. This looks much more professional.
I hope you learnt just a little bit about the armature process, it doesn't have to be perfect or look pretty, it just has to hold some weight. The AI images used are a bit technical but provides an idea.