For Elzinga Art every day, familiar textures and colourful sights inspire fresh ideas for new projects.
Today, I’m sharing a favourite technique: adding printed images to wood.
Whether this is for a handmade sign, a keepsake box, or to decorate a frame, learning how to transfer a favourite photo or design onto wood opens up a world of possibilities.
This DIY skill is simpler than it might seem, requiring a few basic supplies and a bit of patience.
In this blog, follow a step-by-step approach to create lasting, eye-catching crafts.
Ready to see how your own photos and images can become part of your next art project?
Let’s take a look at each stage of the process together, from preparation to finishing touches.
Choosing the Right Materials for Image Transfer
The first step in adding any printed image to wood is gathering the right materials. For this technique, I use:
A wooden item (smooth, unfinished wood works best)
An image printed with a laser printer or inkjet printer (inkjet prints don’t work as well for this method)
Gel medium or pva glue (available at most art supply shops)
A foam brush or flat paintbrush
A plastic card (an old gift card works well)
A clean, damp sponge or cloth
Acrylic sealant or varnish for protection
When picking your image, or for signs your letters remember that text or logos will need to be printed in reverse (mirrored), so that the final transfer appears the right way round.
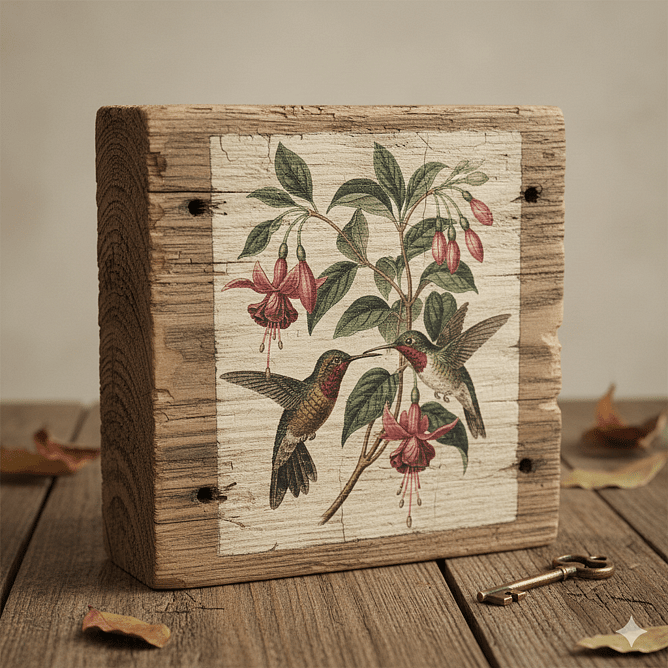
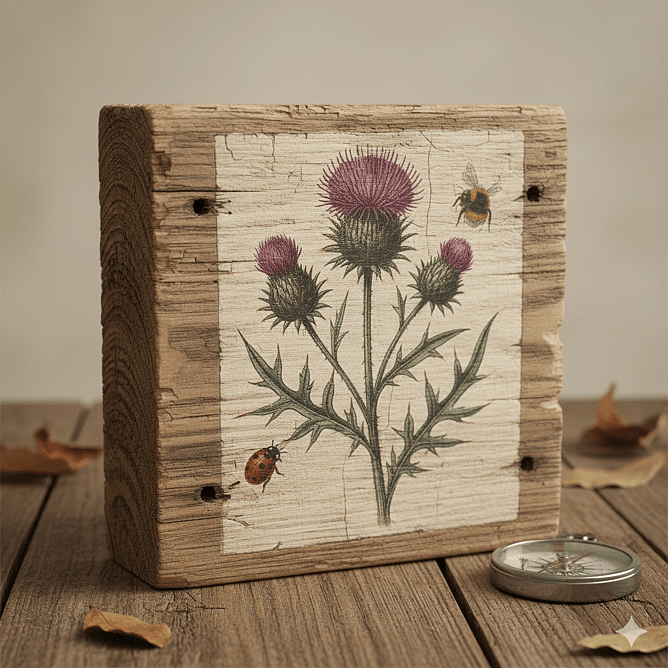
Black and white images create a lovely vintage look, while bold colour prints can add a fun, modern touch.
The wood itself can influence the finished effect – pine and birch have a soft tone, while hardwoods like maple can give a slightly richer result.
I always prepare the wood by sanding it gently until it’s smooth to the touch, then wiping away dust. Uneven or rough areas can disrupt the image transfer, so patience in this step pays off later. Choosing the right surface and image ensures that your final piece will show off sharp details and vibrant colours.
Step-By-Step Image Transfer Process Explained
Here is my go-to process for transferring an image onto wood:
Apply gel medium or pva glue: Using a foam or flat brush, spread a generous but even layer of gel medium/pva across the wood surface. Make sure you cover an area slightly larger than the image.
Cut your image down to as close to its boarders as possible
Position the print: Lay your image face down onto the wet gel medium/pva glue. Press down firmly and smooth out any air bubbles, starting from the centre and working outwards. I use a plastic card or flat ruler for this.
Let it dry: Leave the project undisturbed for at least 8 hours, or overnight for best results. The image needs time to bond securely to the wood.
Reveal the image: Once dry, dampen a clean sponge or soft cloth and gently rub away the backing paper. Start slowly, working in small circles. The ink will remain on the wood as the paper is removed. Go slowly and gently.
Seal your artwork: Once all the paper is gone and the surface is dry, it appear abit white or cloudy so protect your image with a clear acrylic sealer or varnish. This adds both durability and a professional finish and should relieve that cloudy look.
This hands-on process might feel daunting at first, but seeing the image come to life on the wood is incredibly rewarding. Mistakes along the way are all part of the learning curve – and sometimes the best results come from happy accidents.
Finishing Touches for a Polished Look
After revealing the transferred image and sealing it, I like to inspect my project for any final adjustments. Sometimes, small paper fibres can remain, or sections of the image might rub away if the gel medium wasn’t applied evenly. For best results:
- Touch up any light spots with artist-quality coloured pencils or water-based markers
- Sand the edges gently for a softer, vintage feel, using fine-grit sandpaper
- Add accents such as stencilling, hand lettering, or even pressed flowers with craft glue
- Attach hardware if making a sign or hanging art piece
A final layer of sealant not only protects the transferred image, but also helps colours appear more vibrant. Allow it to cure fully before handling or displaying. Watching a piece transform from simple wood and a printed page into something unique always reminds me why I love working with these materials. It’s a celebration of resourcefulness and creativity – a perfect craft for any age or skill level.
Transforming Everyday Materials Into Lasting Art
There’s something truly thrilling about turning a blank piece of wood and a favourite photo into a finished work of art.
Using simple supplies and step-by-step methods, anyone can add a new level of interest to their craft projects.
This technique invites experimentation, whether it’s bold colours, black and white nostalgia, or personal photos for a heartfelt gift.
From my experience at Elzinga Art, these methods are not only creative, but also connect people with the beauty of handmade craft.
Taking the time to learn new skills, no matter how small, can add an extra splash of colour to everyday life.