There is something truly mesmerising about watching a print come to life, layer by layer and colour by colour.
I have always found inspiration right outside my door – from textured gum leaves to bold ocean blues.
Printmaking is an artform that invites creative exploration, whether you are brand new to crafting or looking to add new skills to your artistic toolkit.
At Elzinga Art, I have enjoyed sharing this process with so many others, making printmaking both enjoyable and surprisingly simple to learn.
Today, I want to walk you through a step-by-step lesson in printmaking, complete with photos and tips I have gathered along my artistic journey. Grab your materials, find a sunlit spot to work, and let’s make something truly unique together.
Selecting simple tools and materials for a vibrant start
Before starting, gather the basics. Here’s what you’ll need:
- A soft rubber printing block or sheet of foam
- Linocut carving tools (or even a blunt pencil for foam)
- Acrylic or block printing ink
- A brayer (roller)
- Smooth paper (watercolour or cartridge paper works best)
- A flat board or tray
- Scrap paper and an apron for mess protection
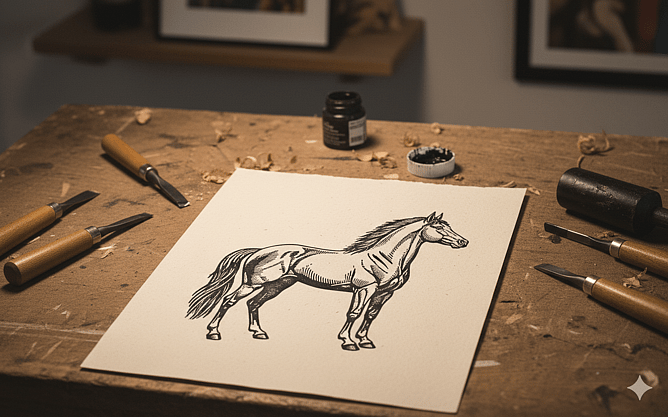
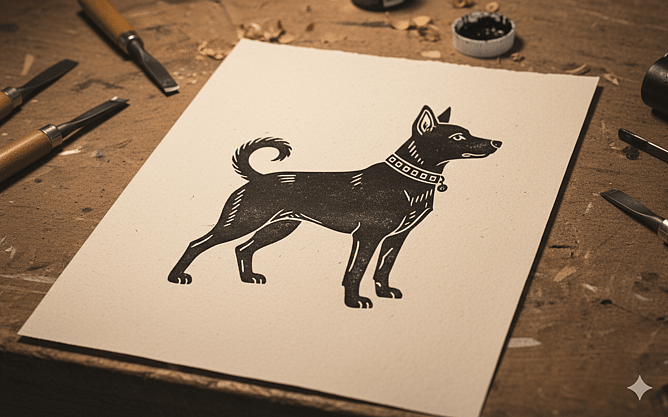
Step 1: Sketch your design. Decide on a motif inspired by your surroundings. Animals, leaves, and geometric shapes work beautifully. Draw this lightly onto your printing block or foam.
Step 2: Transfer and carve. If using lino, carefully carve away the white (non-printing) areas. Foam sheets can be pressed or indented with a pencil. The goal is to make raised areas that will catch ink and print onto paper. Take your time, working from the outside edges in.
Step 3: Prepare your workspace. Lay out all your materials and make sure your area is well-lit. Place scrap paper everywhere ink might travel! Have your papers ready for printing.
Each of these tools and steps builds the foundation for a rewarding printmaking session. Even with simple materials, rich colours and detailed results are possible.

Rolling on colour and perfecting your print process
Now comes the exciting part: rolling out your inks and seeing your design come to life.
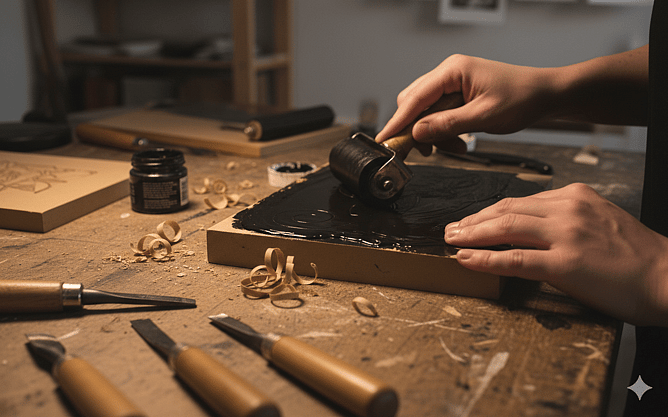
Step 4: Inking your block or foam. Squeeze a line of printing ink onto your flat board or tray. Use the brayer to roll the ink until it looks smooth, slightly tacky, and evenly coated – you should hear a gentle hiss as you roll.
Roll the ink across your carved block or foam, making sure you cover all the raised surfaces. It’s okay to layer gently rather than overloading with ink – too much can blur your lines.
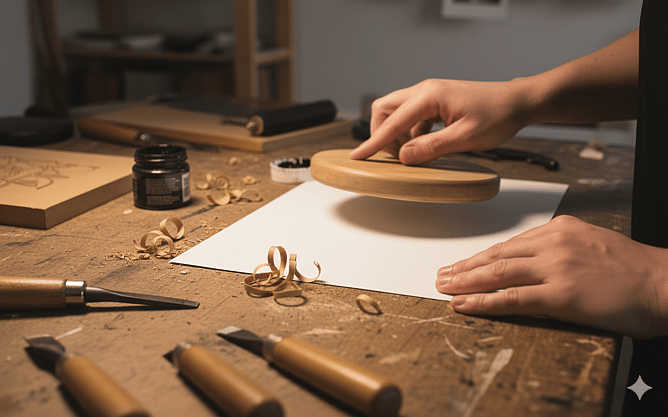
Step 5: Making your print. Carefully lay your chosen paper onto the inked block. Press down firmly all over, using your hands or a clean roller. If you’re using foam, pressing with your palm or a spoon works well.
Slowly peel the paper back from one edge. This is always a moment of anticipation! Your unique design should appear on the page, in reverse.
Step 6: Experiment and repeat. Try varying the ink colours, mixing shades on the tray for gradients, or printing onto coloured paper. Mistakes and happy accidents often become the most interesting prints.
Practising these steps helps deepen understanding and allows your personal style to shine through.
Adding layers and finishing with creative flair
Taking your printmaking further involves layering colours or combining shapes for complex designs.
Step 7: Multi-layer printing. Once your first print is dry, carve a second block or use sections of your first. Ink these in a new colour and align over the first print for layered effects. Registration marks (drawn guidelines) can help with alignment.
Step 8: Experiment with textures and embellishments. Press leaves or fabric into the ink before printing, or print onto different surfaces such as fabric, greeting cards, or even wood. Use fine pens to add hand-drawn details once the print is dry.
Printing tips:
- Clean your tools after each use to keep colours crisp
- Store prints flat under a weight to prevent curling
- Don’t hesitate to play with metallic inks or translucent layers
Adding your own twists on simple steps takes a basic printmaking session from enjoyable to extraordinary, allowing every print to showcase your individual creativity.
Celebrating printmaking discoveries
Printmaking is a journey filled with surprises, vibrant mistakes, and bold discoveries. I find endless inspiration for new designs and fresh colour palettes.
Step by step, the process becomes a meditative rhythm; carving, rolling, peeling, and admiring a design that didn’t exist before.
Whether you are just starting or looking for ways to develop your skills, remember that each print is its own adventure.
I encourage anyone reading to try this craft – it’s simple to start, rewarding to practice, and always full of creative potential.
Let the colours of your surroundings guide you and let every print tell its own story. Life in colour truly is a life fully lived, and I am grateful to share this artistic path with you.
ELzinga Art hopes this lessons has helped you in your artistic journey.