Wire figure art holds a special charm, inviting people of all ages to shape and twist new ideas into tangible, whimsical forms. It’s hard not to be inspired by the endless movement in everyday life, from native birds to bustling community events.
That inspiration finds a perfect outlet in wire figures, which turn a simple piece of wire into something remarkable with just a few bends and twists. Through Elzinga Art I discovered how this craft allows anyone to experiment with form, technique, and character, using only basic materials and their imagination.
Whether it’s capturing a striking pose or telling a story with a unique shape, wire art serves as a gentle introduction to sculpture. It’s approachable, satisfying, and full of surprises, making it an enjoyable project for both curious beginners and those searching for a new artistic challenge.
Materials required
🛠️ Materials Needed
Armature Wire: 16-gauge or 18-gauge dark annealed wire (it’s softer and easier to bend by hand). I generally buy a black wire from bunnings, its wrapped in brown paper and its kept away from the normal wire isle, so ask where to find it, it has a great rusting quality too, if you wish to have rustic figures, add water to them and they will rust incredibly quickly. Sometimes using black wire as well as glavanised wire (silver) also can add an interesting effect when used together.
Binding Wire: Thinner 24-gauge wire for wrapping around your figure, its much easier on your hands!
Mixed Media: Fabric scraps, embroidery floss, beads, buttons, and charms.
Tools: Needle-nose pliers and wire cutters. The pliers are much easier to use for twisting wire than wire cutters.
Base: A small block of wood with two small holes drilled into it.
The process
Step 1: The Continuous Outline
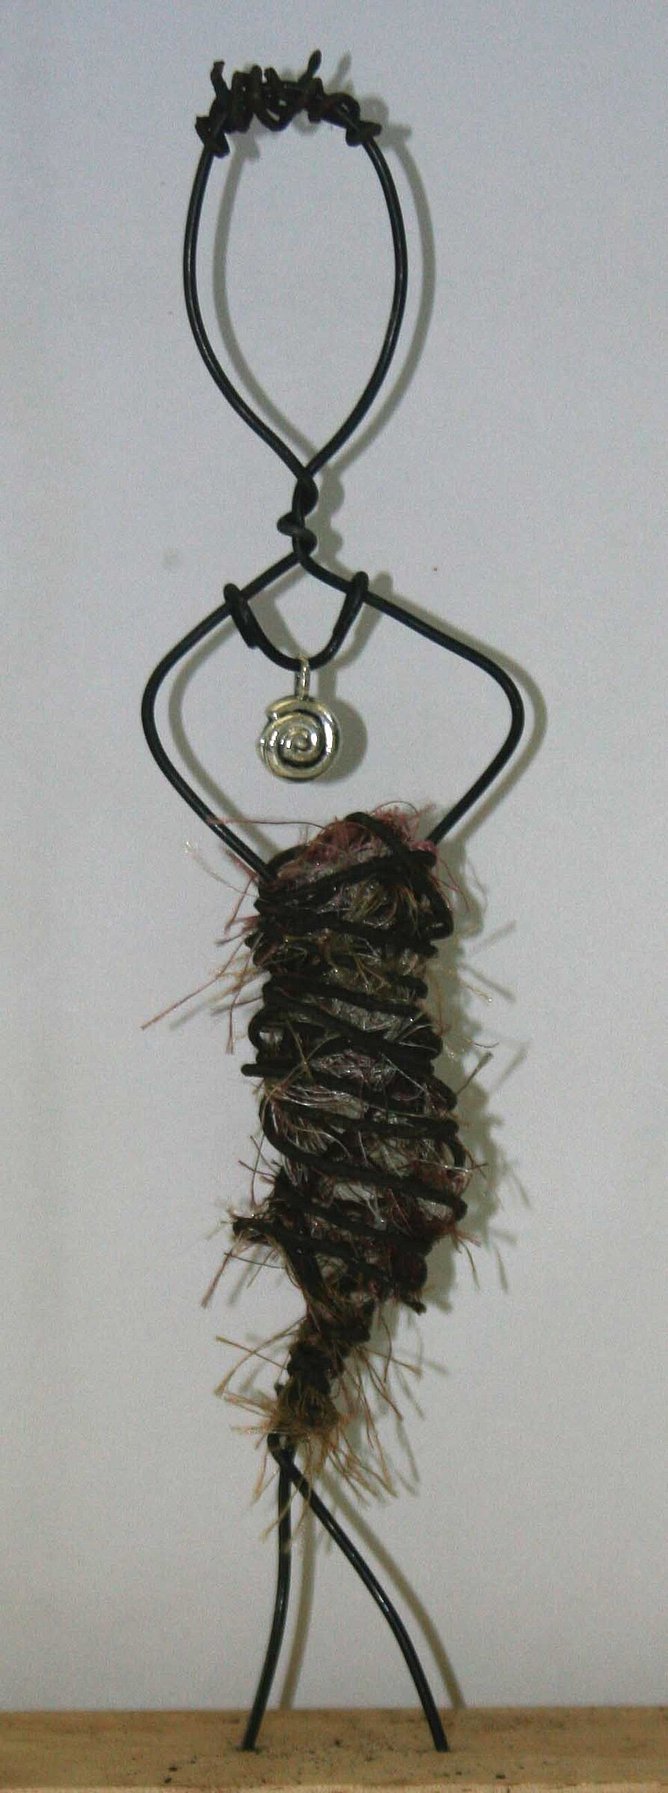
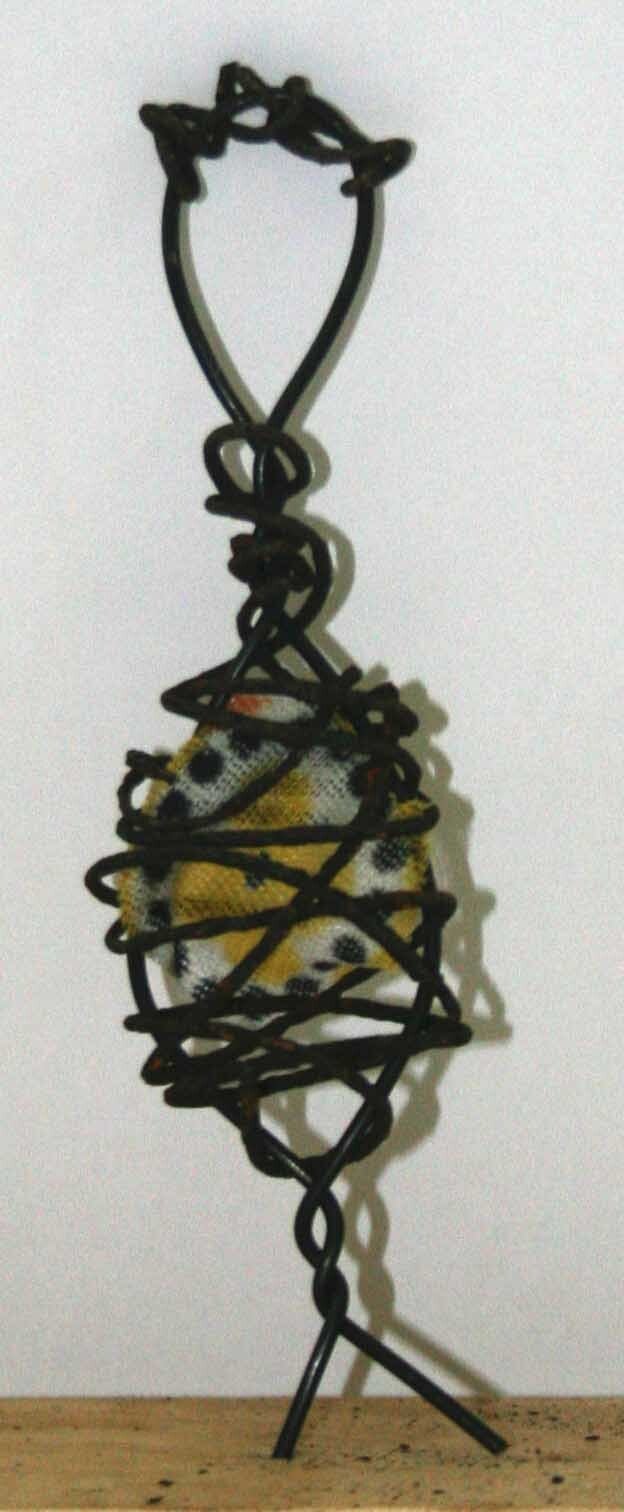
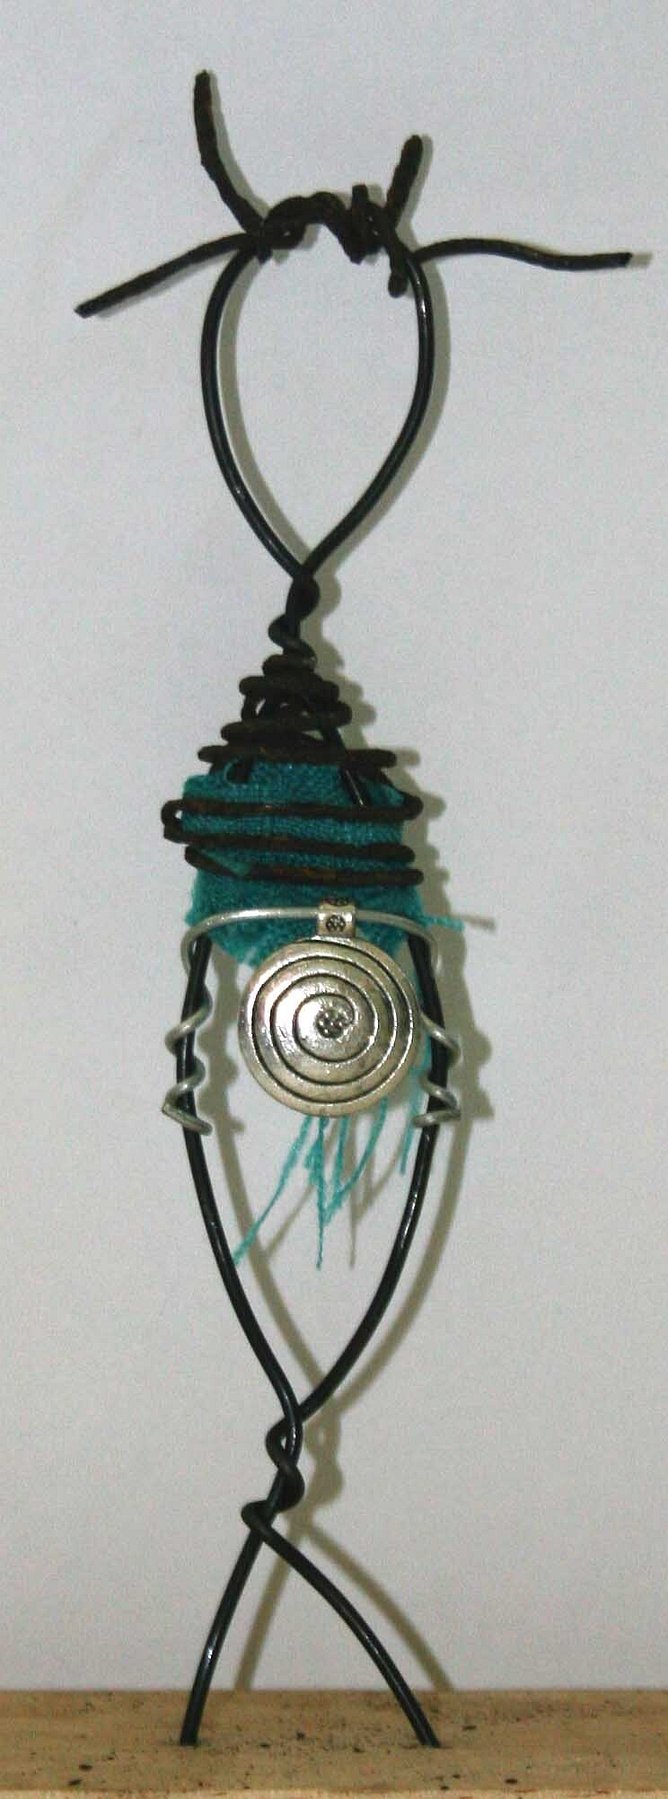
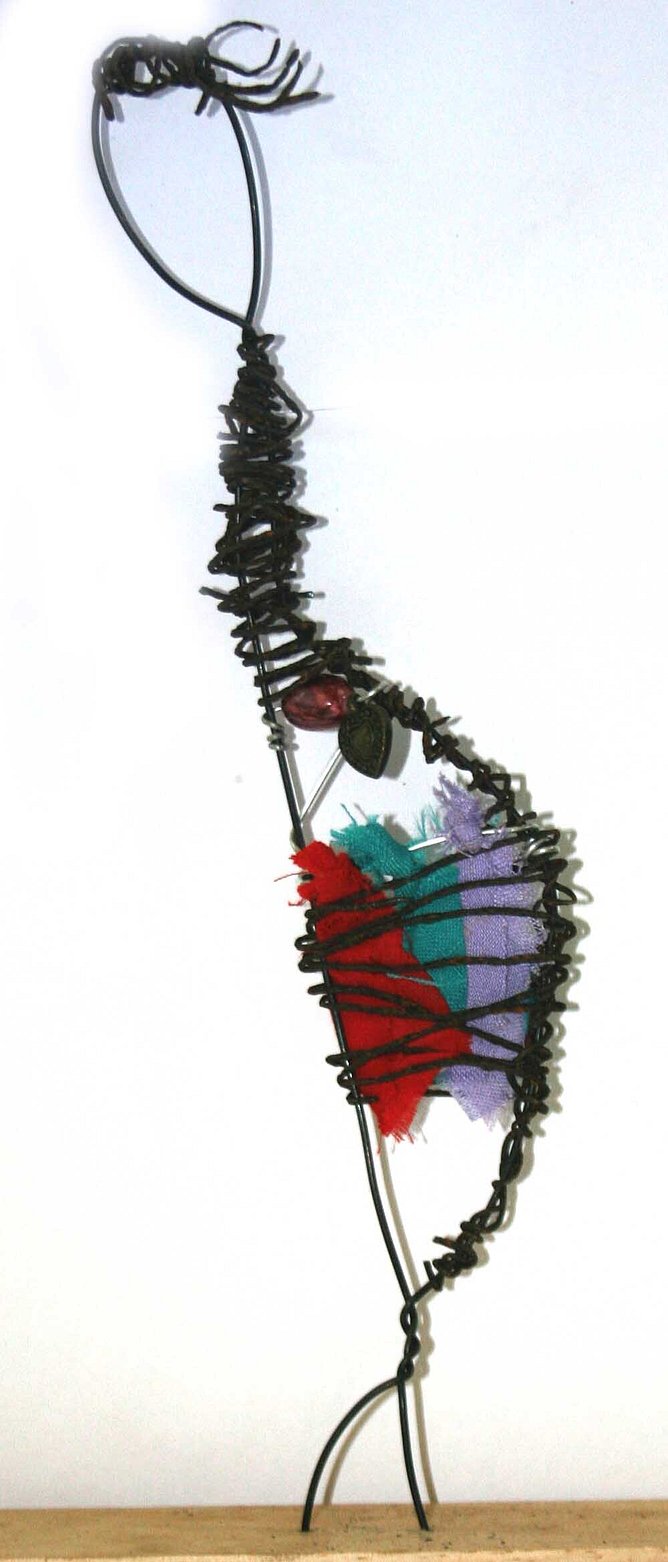
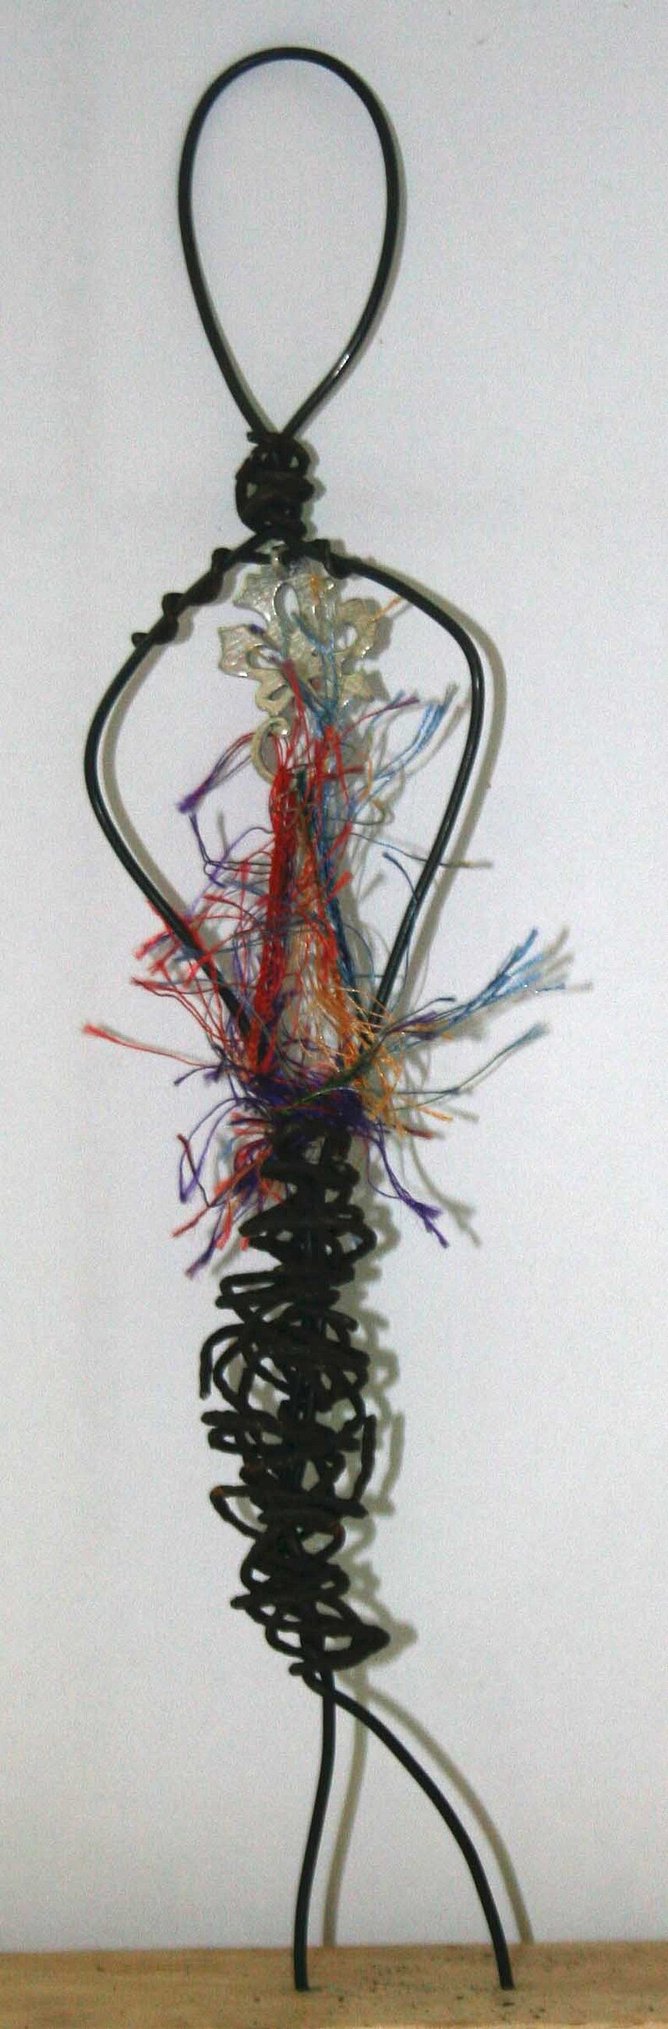
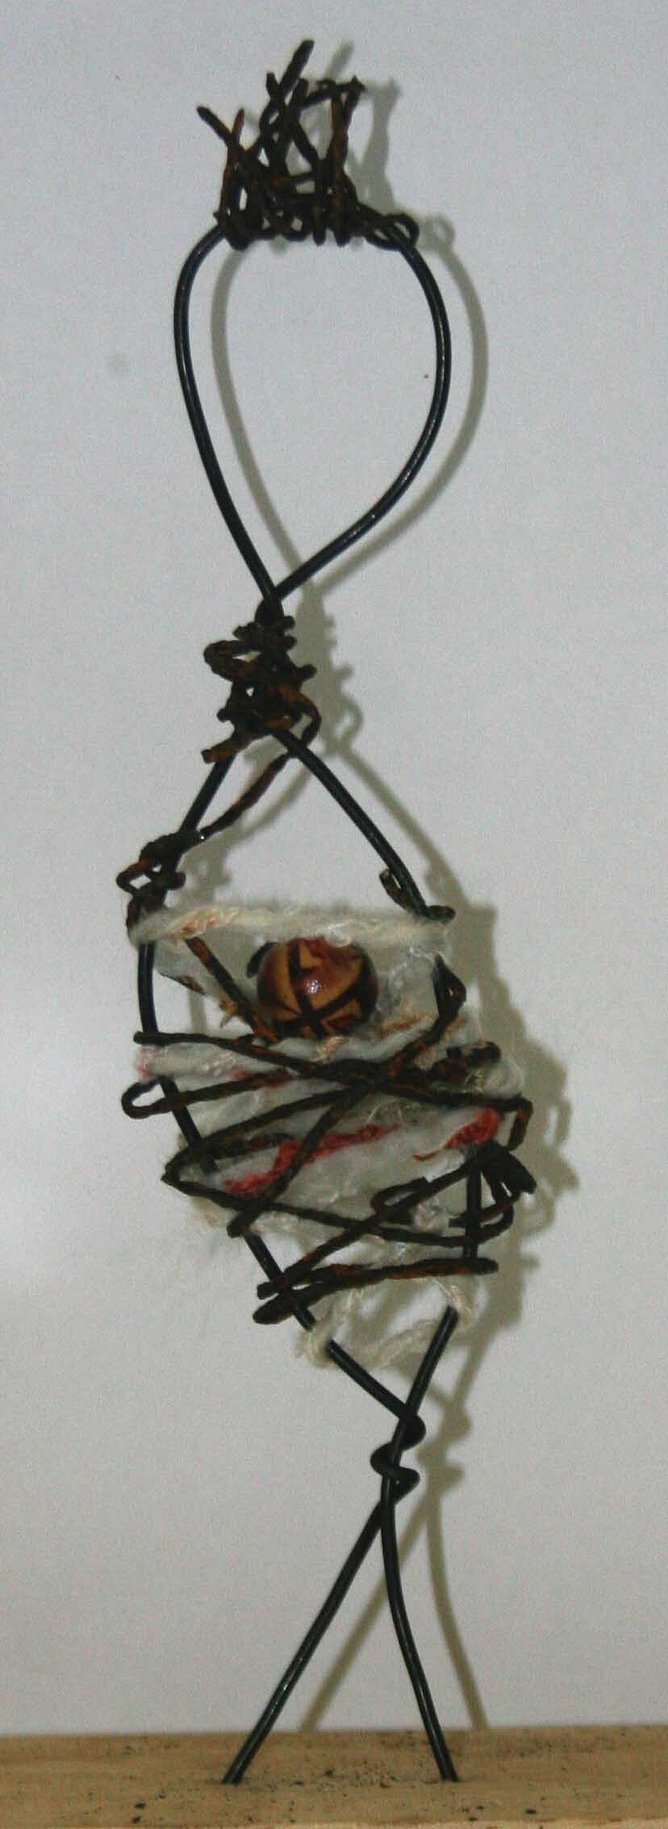
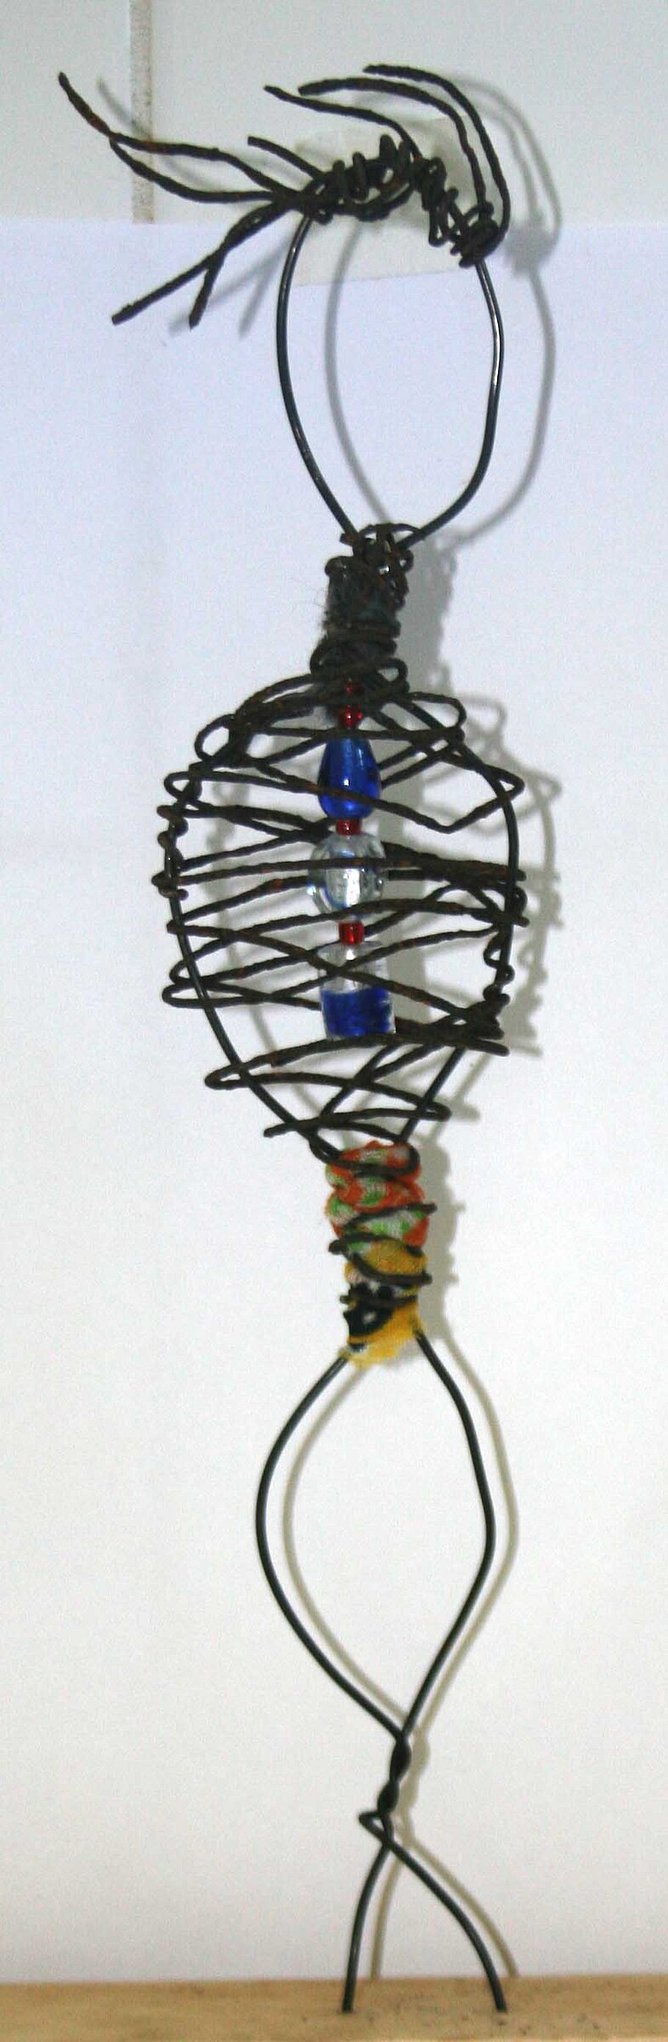
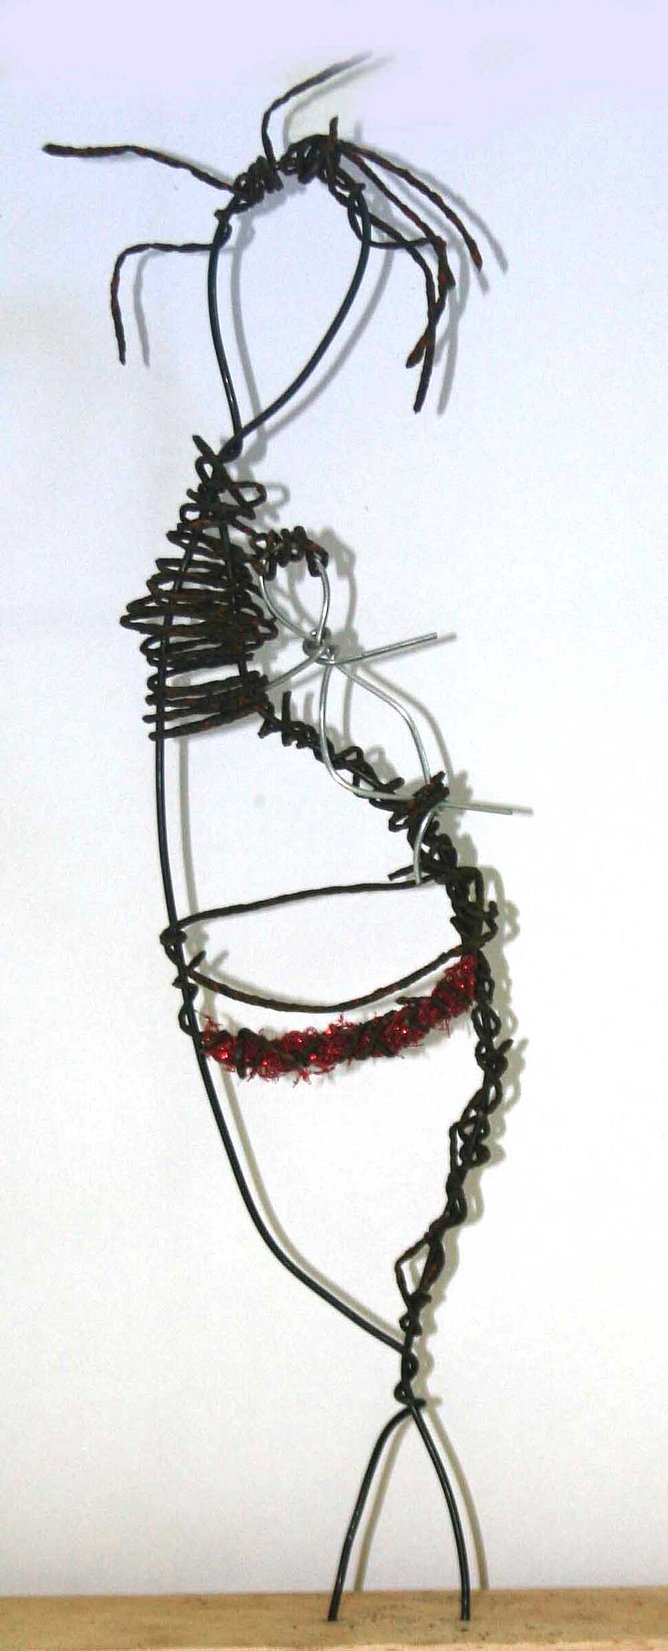
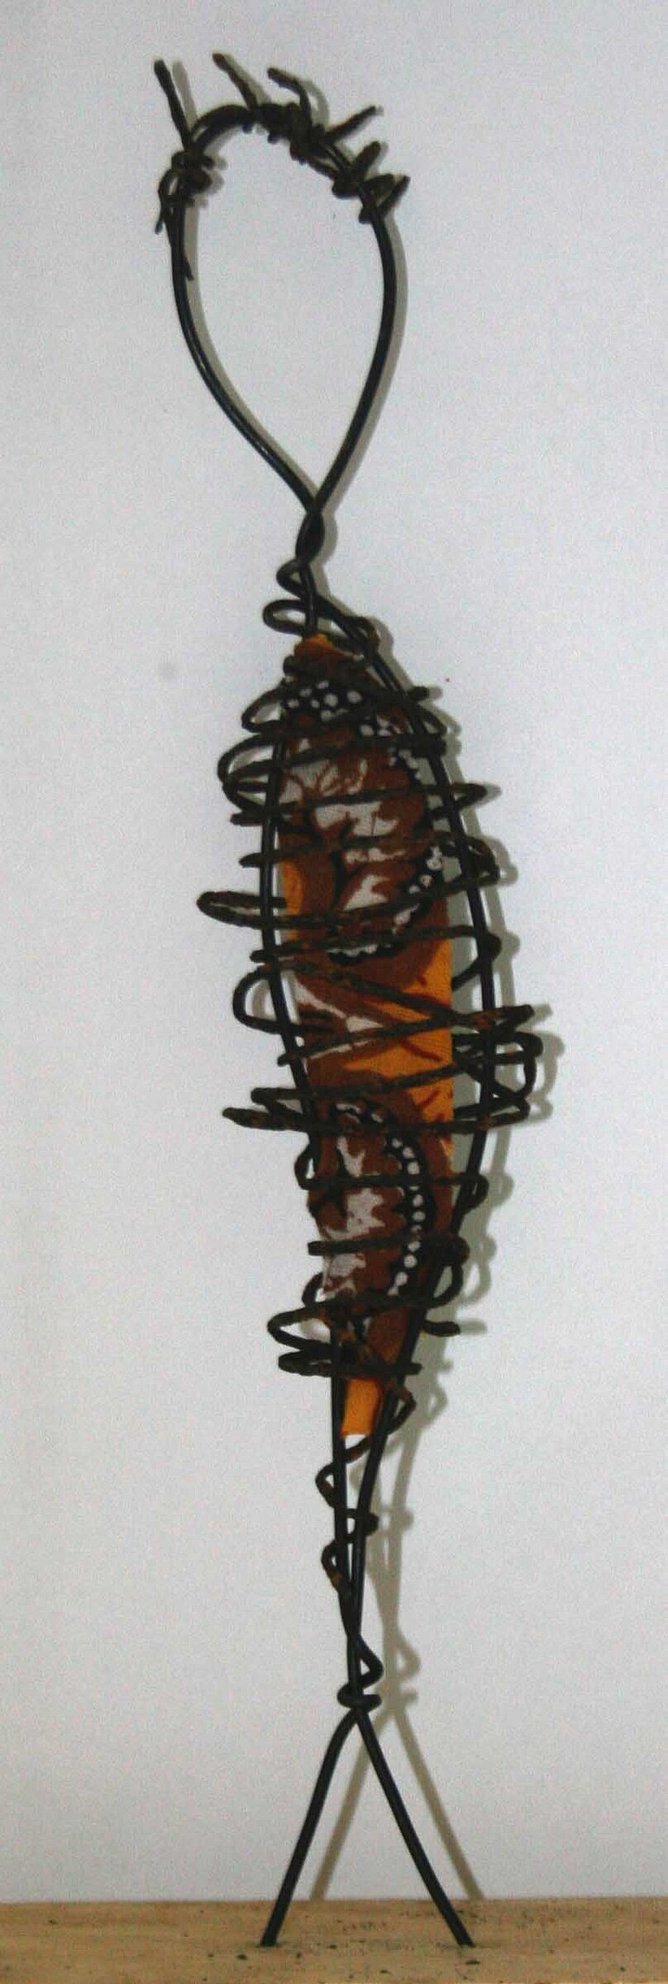
Take a good look at the images, my created figures start with a loop armature, it is the easiest way to start these figures.
Cut a long length of wire (about 24 inches).
Bend the wire in half to find the center or so the two ends come together.
Make a head loop/circle at the wire bend, how ever big you want your head to be, then twist the wire a few times at the base of your head to secure. These twists effectively become your figures neck.
Next create a longer loop to be your body and again twist at the base to secure it, allow enough wire at the bottom to be legs and to secure into your base.
Expand the wire out to create the torso/hips, or shape of your required figure. E.g. is it a boy/girl shape, is it more an abstract shape, or cartoon character shape etc, larger or small shape etc
These figures are meant to be figurative meaning they don't require all anatomical parts to be attached, so unless you require arms, leave them off, if you wish to have arms, cut an additional wire piece and connect it where your arms are required and twist very tightly to secure.
Step 2: Defining the Silhouette
Use thinner wire or the remaining tails of your main wire to "fill in" the skeleton.
The Head: Note how some figures have "hair" made of messy, coiled wire at the very top.
The Torso: Wrap wire around the midsection to create a "cage" or a solid mass. This gives the figure a sense of weight.
Step 3: Adding the "Heart" (Focal Points)
Before you finish wrapping the torso, add your mixed-media elements. This is what gives each figure a story.
Beads & Charms: String beads onto the wire or hang a charm inside the torso loop.
Fabric: Thread scraps of colorful fabric or frayed yarn through the wire ribs. This mimics clothing or internal "feelings."
Step 4: Texture and Wrapping
The "messy" look is intentional!
Scribble Wrapping: Don’t worry about being neat. Wrap the wire back and forth like a 3D scribble.
Fraying: If using fabric, pull at the edges to create a "weathered" or "ethereal" look. There is no rules to these figures.
Step 5: Mounting
To make the figure stand:
Straighten the two wire ends at the bottom (the "feet").
Insert them into the pre-drilled holes in your wood block.
If they are loose, a drop of glue or a slight "kink" in the wire inside the hole will keep them upright.

💡 Creative Reflection
Once finished, look at your figure and ask:
Gesture: Is the figure leaning? Does it look tired, proud, or energetic?
Symbolism: What does the item inside the "chest" represent?
Take one, two, or more and create family blocks where each figure represents a member of a family, you can add pets or other items such as skateboards or surf boards taking in hobbies or interests. Your imagination is the only thing stopping your creativity now that you know how to create these interesting wire sculptures
Bring Personality To Life With Simple Techniques
Once the basic shape comes together, adding personality and finishing touches turns a wire frame into a captivating character. For me, the magic really happens when small changes in angle or posture bring figures to life—whether it’s a dancer mid-leap or a quirky animal with oversized feet.
I find it’s easy to add volume by wrapping thinner wire or strips of fabric around the frame. Adding beads for eyes, colourful thread for decoration, or paint for detail turns the figure into something special. Sometimes, attaching objects like feathers or recycled buttons can bring unexpected flair.
Trying different joining methods—such as twisting, looping, or wrapping—keeps the building process interesting and increases structural strength. Over time, experimenting with these details has taught me to see potential everywhere, knowing that each figure is truly unique. The possibilities are endless, from tiny keychain characters to desk sculptures, sparking creativity with every piece made.
Share Your Creations And Keep Exploring New Techniques
Creating wire figures has opened up a fresh way to explore art, combining simple materials with endless imagination. Each project I complete brings new skills and a deeper connection to the world around me.
At Elzinga Art I’m never short on ideas for the next figure. Just look to a magazine, the tv, or people watch in the street, loads of ideas are sure to follow.
Whether someone crafts as a relaxing hobby or an entry into sculpture, these little artworks can bloom into something truly meaningful. The journey never ends—there’s always a new pose to try, a new material to incorporate, or a new theme to explore.
Life really is richer, and far more colourful, when you let your hands and heart guide each creative step.