There is something undeniably captivating about watching paint dance and swirl across a canvas. Here at Elzinga Art we offer opportunities that inspire creativity, and learning the art of acrylic pour painting feels like capturing a little bit of that energy.
I have enjoyed guiding members of my community—whether seasoned artists or curious beginners—through the accessible, expressive world of acrylic pours for quite some time now.
Acrylic pouring is more than just an art project; it is a chance to explore colour, texture, and form in a way that is both playful and freeing. Without the need for advanced drawing skills, people of all ages can create a unique artwork that reflects their personality and mood.
In this post, I will break down the basics of acrylic pouring, share practical tips for creating dazzling effects, and highlight ways to make your artwork stand out.
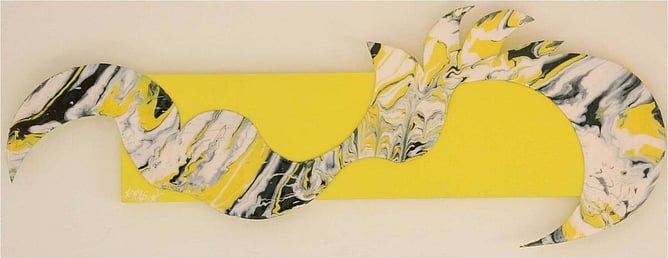
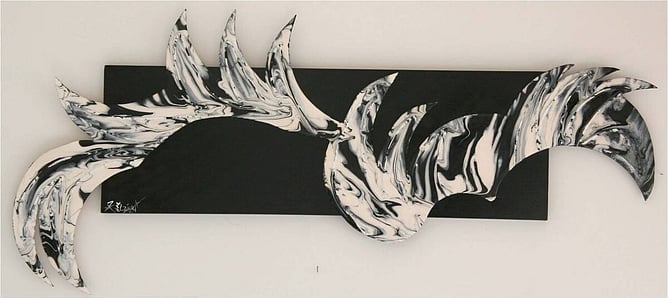
You can do acrylic pours onto mdf cut boards, simply cut and shape using a jigsaw, to create stylish one of a kind shapes

Get super creative and add acrylic pouring to styrofoam balls and thread them with wire and create circular shapes that truely impress. Not all acrylic pours have to be on canvas or boards. Think outside the box!
Getting Started With Acrylic Pour Painting Essentials
Before pouring a single drop of paint, it’s important to gather the right materials—this helps ensure a smooth and enjoyable process. Acrylic pour painting begins with a few essentials:
Acrylic paints in your chosen colours
Pouring medium for the right consistency
Sturdy canvas or painting board
Mixing cups and stir sticks
Protective gloves and table cover
I always recommend choosing paints with good pigmentation, as this creates vibrant swirls and cells. The pouring medium is key—it thins the paint without weakening its colour, letting it flow properly over the canvas. For first-timers, consider using a pre-made pouring medium, as it takes out much of the guesswork.
If you're working with children or young people in a school environment, most likely your using bulk purchased paint, and keeping costs low, so instead of using pouring mediums, just use water, it works fine for amature use. Just add water and ensure you shake very well, you do not want bumpy lumpy paint flowing out ruining your work.
I was a school art teacher, l used to do this and use water bottles with lids, and get the young people to shake shake shake! You're are looking for the paint to run freely, but still look thick like paint and not watery like painted water. The difference will be evident in the finished result if the mix is too watered down.
If your using flow medium -Mix each colour in a separate cup with the pouring medium, aiming for a texture similar to runny honey. Once the paints are ready, you can use simple techniques like the ‘dirty pour’ (layering colours in a single cup and pouring in one go) or ‘flip cup’ (inverting the cup onto the canvas and lifting it). Cover your workspace; acrylic paint can travel a fair distance during the pouring process. As always, experimentation is encouraged—the process is as much about discovery as it is the outcome.
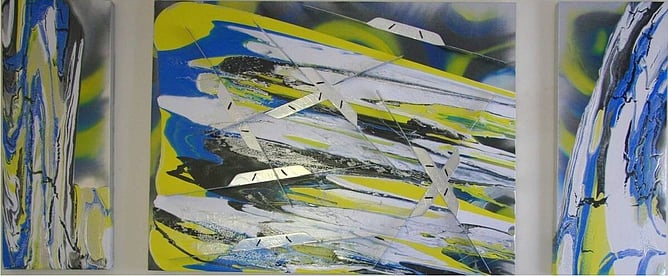
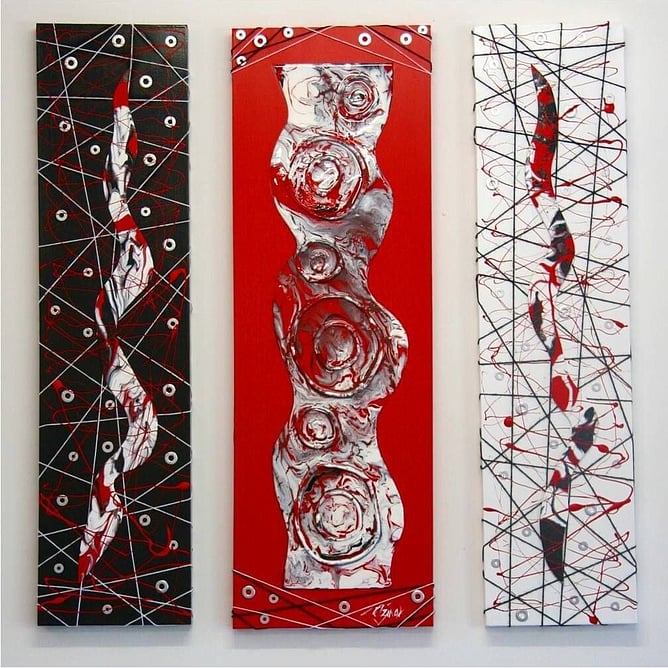
Change the directions of your pours to add interest if doing more than one canvas, and try leaving voids. In this piece, l spray painted the background first, then poured leaving areas of the spray paint shining through. I added metal effects afterwards to add even more interest.
Exploring Techniques for Striking Visual Effects
With the basics in hand, there is plenty of room to get creative. Different pouring techniques add variety and drama to your work. But first of all start by entirely adding a base coat of paint to your base, and alot, you want the surface to be wet when your pours are added. The reason for this is, having a wet base allows the poured paint to be slippery and glide across the canvas freely without friction.
Some popular methods I love introducing include:
Puddle pour: Pour each colour separately in overlapping circles.
Swipe: Pour out pools of colour and swipe them with a flat tool to reveal striking cells.
String pull: Dip string in paint and drag it across the surface for delicate lines.
Blow tools: Use of a hair dryer to stretch and blow paint or straw for gentle edge blows
Oil: Experimenting with additives like silicone oil introduces fascinating cellular patterns in the paint. By tilting the canvas, you control the spread and blending of colours, creating marbled or lacy effects. Watching paint move and settle is a mesmerising part of the process.
It’s important to allow your work plenty of drying time—typically at least 24 hours in a dust-free area. The magic of acrylic pouring is that no two pieces are the same, making each session a unique creative adventure.
Don’t worry if your first try comes out differently than expected. Layer, tilt, and let the paint lead—sometimes the most beautiful results happen by chance.
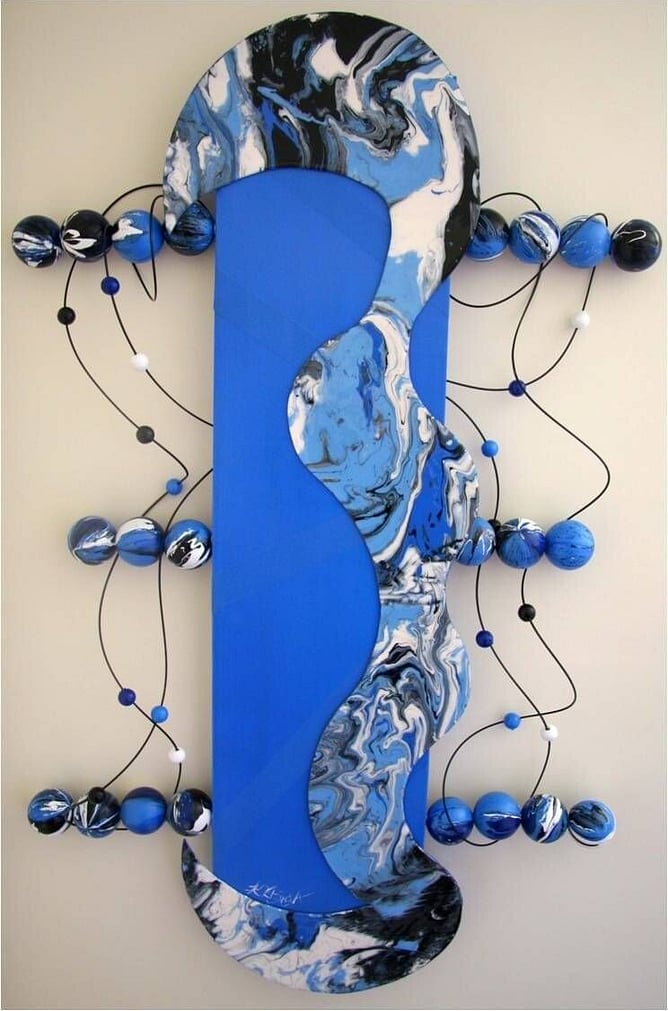
Create real novelty paintings, by combining different surfaces together
Change your shapes and colour scheme around but using the same 3 colours
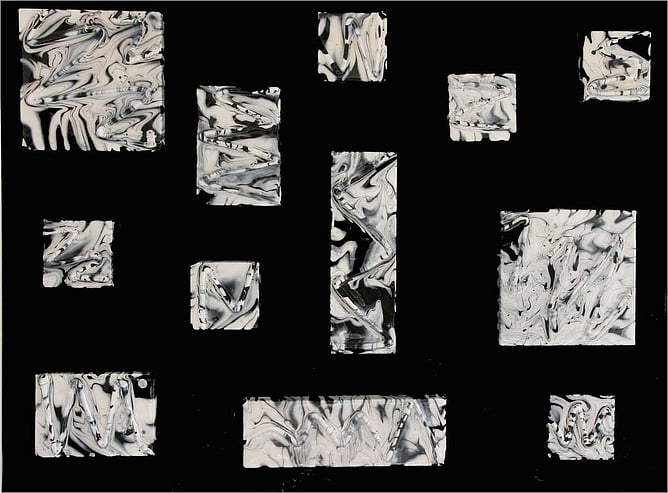
Add small canvas blocks to a bigger canvas to create 3D paintings
Finishing Touches and Celebrating Your Unique Artwork
An acrylic pour painting truly comes to life once it’s dry and you can take in the final interplay of colours and forms. To ensure your artwork stands the test of time, consider sealing it with a clear varnish or resin—this not only protects the surface but also intensifies the colours and adds a glossy finish. Hanging your piece in your home or gifting it to a friend brings a sense of accomplishment and pride.
Everyone’s creative voice is different, and acrylic pouring is a wonderful way to let that voice sing. No special skills are needed—just curiosity and the willingness to experiment.
For more inspiration, free downloads, or to browse unique art lessons come visit us again at Elzinga Art. Every pour celebrates individuality, and every swirl is a testament to the joy of making art part of everyday life.
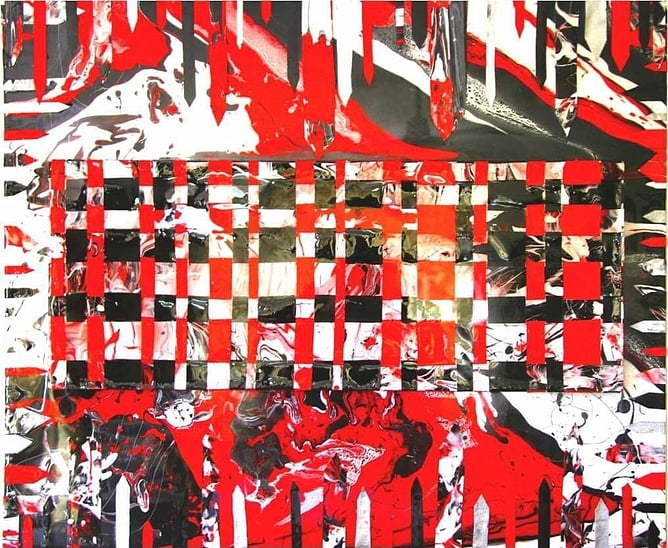
Often a lot of paint is wasted in the pouring stage, if your clever, you'll be thinking of secondary works at the same time your doing your first. I will have another canvas sheet under my work, to catch the left over paint, when l get enough, l simply cut the canvas into stripes, and weave them together. This can create a stunning effect. In the work above l even added stripes to the outside.

I hope you enjoyed this Elzinga Art lesson on acrylic pouring techniques.